Search This Blog

Sunday, 17 April 2011

Anderson Shelter Restoration: Day 5, 6 & 7

On Friday, I arrived at the garden to find that the hole had been dug for the Anderson shelter! 

To my surprise, it is almost perfectly rectangular, and should make locating the shelter in position much easier.

A local business (details to be disclosed at a later date) donated a mini digger and the manpower to dig the 3 foot-deep hole, which measures 6'6'' x 4'6". This has saved us an enormous amount of time and effort, and we very much appreciate it.


During the rest of the day, we painted silver top coat on some of the previously restored and undercoated sections of the shelter, filled sand bags in preparation for installing the shelter, planted some more potatoes in some spare sand bags and moved a raised bed to make room for the German fighter aircraft wreckage that should be delivered at the end of the month. 

Luckily, I had lots of help during the day, which turned out to be very productive!


'Winston' potatoes planted in sand bags.


On Saturday, we continued restoration work on the next two side panels of the shelter. This involved wire brushing, angle-grinding and rust-proofing. 


These two panels are probably the best of the 5 we had left to do, and only required minor repair work, although this still took most of Sunday to complete!


Once treated, we began repairing holes using wire gauze and chemical metal. in some cases, this meant reforming corners of the panels which had rusted away. 

This was a little fiddly, but the job turned out well in the end. Once filled / moulded, these repairs then required sanding in order to produce a surface which could then be painted. 


As a bit of light relief, I decided to put some period anti-blast tape on the greenhouse to match the potting shed! Looks quite good!


As well as preparing the next 2 side panels for painting, we also did some more planting on Sunday. In the largest bed, we decided to sow some root vegetables rather than opting for potatoes as we have for the past 2 years. This is what we planted in the bed:

  • Swede (Gowrie)
  • Shallots (Golden Gourmet)
  • Garlic (Picardy White)
  • Carrots (Early Nantes 5)
  • Parsnip (F1 Gladiator)
  • Turnip (Purple Top Milan) 
  • Beetroot (Detroit 2 - Crimson Globe)
After a busy day, I finished off by weeding and tidying the herb garden, which is looking surprisingly healthy after very little attention over the winter months. A very productive 3 days!


Wednesday, 13 April 2011

The Sowing and Planting Begins. . .

It's been a busy few days in the garden this week; the Easter holiday sunshine has allowed us to begin planting seeds in pots in the greenhouse, potatoes in one of the raised beds and in potato bags / bins, and 4 new apple trees in large pots outside. We have also had a general tidy up around the garden, and moved one of the raised beds to eventually allow better access to the Anderson shelter, once it's restored and in place. 

We also have a second raised bed to move, to allow room for our 'downed Messerchmitt' set piece to be displayed. By chance, some much needed pruning has resulted in a hole between the trees big enough for our 'Battle of Britain' fighter to have crashed through before spreading its wreckage over the ground in the garden. . . however; that's for another day! 

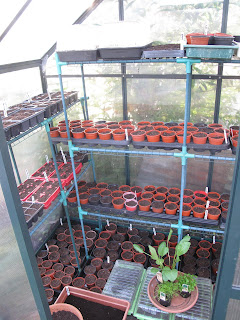
The greenhouse has been filled with pots containing all the seeds that will eventually fill the garden. 

This is what we've planted so far:


  • Runner Beans
  • Borlotto Climbing Beans
  • French Beans
  • Ying Yang Beans
  • Broad Beans (Dwarf)
  • Broad Beans (Longpod)
  • Sugar Snap Peas
  • Kale
  • Purple Sprouting Broccoli
  • Cabbage (2 varieties)
  • Courgette
  • Marrow
  • Squash (Sweet Dumpling)
  • Squash (Stripy)
  • Squash (Uchiki Kuri)
  • Pumpkin (Amazonka)
  • Pumpkin (Jack O'Lantern
  • Gourd (decorative)
  • Fennel (Florence)
  • Aubergine
  • Tomatoes (3 varieties)
  • Tomatillo
  • Pak Choi
  • Rocket
  • Ginger
  • Nasturtium
  • Calendula
  • Morning Glory
  • Sunflower (Little Leo)
  • Sunflower (Giant Single)


Due to the number of vouchers we managed to collect through the Morrisons voucher scheme last year, we were given an additional 4 apple trees which came free with the order we placed. 

These dessert apple trees were planted in large pots, and will line the pathway next to the edge of the garden.


3 varieties of potato were planted in one of the large beds, although a need to rotate crops has meant that a different location had to be found compared to last year. The 3 varieties we are growing this year are: 'Winston' (obviously fitting into our WWII theme!), 'King Edward' and 'Maris Peer'. These were also used to fill the potato bins / bags, as were the varieties 'Rocket' and 'Piccolo Star'.
A foot was left around 3 outside edges of the bed, and this space will eventually be used to plant the sugar snap peas which are currently growing in the greenhouse. 

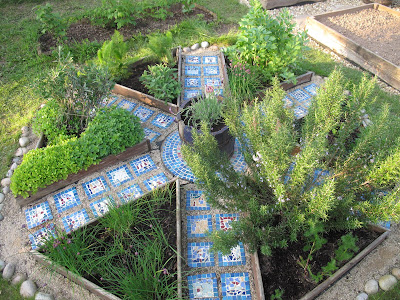
The herb garden is also now beginning to look healthy again; here the purple buds of the chive plants can be seen.


The evening sun sets over the garden on Tuesday.


Sunday, 10 April 2011

Anderson Shelter Restoration: Day 4

Today we began by giving the side panel we prepared yesterday a coat of undercoat on the outer and inner surface. 
Once thoroughly dry, this will be given a coat or two of silver rust-protecting top coat.

The lower front panel was then given a coat of rust-protecting silver top coat.


The next job was to cut a new right-hand front panel to replace the original one that was beyond repair from our shelter. Unfortunately, the correct size of corrugated steel is no longer available, so we had to compromise with commercially available material, kindly donated by Roland from Plymouth Museum. This corrugated sheeting is much thinner and more flexible than the original, but once buried in the ground, we hope that this will not cause any problems. 

The left-hand panel we restored previously was used as a template to mark out the new panel. This was then cut out using the angle-grinder, wire brushed and repaired ready for rust-treating and painting. 

Once we had finished using the original panel as a template, it was given a coat of undercoat in preparation for its silver top coat.


Here, the four panels making up the front of the Anderson shelter can be seen laid out together; the non-original panel can be seen on the left - once in place, this will be on the right-hand side. Tomorrow we will begin work on the next side panel - and plant some seeds in the 'Dig for Victory' garden!

Saturday, 9 April 2011

Anderson Shelter Restoration: Day 3

Another fine, sunny day meant that we could get outside and continue restoring the panels of the air raid shelter; today, we spent 10 hours angle-grinding, wire brushing, sanding, rust treating, filling and painting, and it's beginning to look good!

The first job was to finish filling and sanding the lower front section before painting. Chemical metal was applied to fill the hole in the panel, which had been rust-treated previously. This picture shows the chemical metal which has been applied over metal gauze to add strength. 
One set, this is roughly sanded down with an electric sander, then finished off by hand.

Once finished, this panel was given a coat of undercoat in preparation for a final layer of silver top coat.

The second panel to receive attention was the front side panel. This section is in quite good condition, however it did have a series of small rust holes in the middle which needed to be wire brushed, rust-treated and repaired. 

The lower half of the panel will eventually be below ground when the shelter is in place, so an ultra-smooth finish wasn't necessary, although the finished repair looked good front and back.


This picture shows the finished front panel, filled and rust-treated awaiting undercoat and a silver top coat.


Next, we started work on the first of the six side panels. First the panel was wire brushed on the top and bottom to remove any loose rust. The side panel was then rust-treated. This chemical not only strengthens the metal, but also converts any rusty metal back into its original form. Strangely, when working, the chemical turns the metal blue, before drying in a finish resembling it's original colour. 
The rust-treatment working.
The panel after being rust-treated. Next, the small holes were repaired and sanded down in preparation for painting.
 
The finished panel ready for painting. 

We now only have 5 panels left to restore, and 4 more to fabricate from new to replace the missing ones. . .watch this space!


Sunday, 3 April 2011

Garden A.R.P. Post

As the sun was shining, I decided to take advantage of the good weather and take a few photos of the new potting shed, complete with its A.R.P.-themed decorartion. The shed will act as a 'Warden's Post', and will be added to throughout the year.